Monday 29 August 2011

Steak Sammies

We happened to have a little leftover steak tonight (rare in this house), so M and I turned them into Steak Sammies. They were delicious. And it's all I have for today.....my baking plans got put on hold after I slammed the sliding door on my finger. Ouch! So this is what you get today :) Enjoy!

Steak Sammies
  • Splash EVOO
  • 1/4 onion, thinly sliced
  • 1 bell pepper, thinly sliced
  • 6 oz cooked steak, thinly sliced
  • few generous shakes Montreal Steak Spice
  • 8 slices of bread, buttered on side
  • 1 tomato, thinly sliced
  • 4 oz cheese of choice, shredded
1. Pre-heat oven to 350 degrees. In a large fry pan, heat up oil, then add onion and peppers. Cook for a few minutes, or until soft. Add steak meat and sprinkle pan with steak spice. Cook on med heat, until steak is hot throughout.
2. Place buttered bread on cookie sheet, buttered side up. Put a few tomato slices on 4 of the pcs of bread, then evenly distribute cheese on top of these 4 slices. Divide the pepper/meat mixture onto the other 4 slices.
3. Place in preheated oven for about 5 minutes, or until cheese is melted and bread just starting to brown.
4. Stack 1 pc of the tomato bread with one of the steak breads to form a sammie. Serve and ENJOY!

Saturday 27 August 2011

Smoked Gouda Lasagna

Here's the recipe for the lasagna I made using the roasted tomato sauce. Dylan loves smoked gouda (ask him his favourite cheese and he'll answer this). We usually have it on hand, so I decided to make a lasagna with it. It was great. Give it a try to mix up things up a little! Enjoy!


Smoked Gouda Lasagna
  • 1.5 lbs ground beef
  • 1/2 tsp red pepper flakes
  • 1/2 tsp dried oregano
  • s&p
  • 3-4 cups Roasted Tomato and Garlic Sauce
  • 9 lasagna noodles, cooked
  • 1 egg
  • 1 lb ricotta
  • 1/2 lb smoked gouda, sliced or shredded
  • 1/2 lb mozzarella, sliced or shredded
  • 1/2 cup shredded parmesan
1. instructions later....I'm too tired right now!

Friday 26 August 2011

Roasted Tomato and Garlic Sauce

It's tomato harvesting time. I am sure if you have a tomato plant, you have lots of tomatoes right now. One of my favourite things to do with plenty of tomatoes (besides eating them on sandwiches) is to roast them and turn them into a sauce. I have actually been asked a few times lately about this recipe, so I thought I better post it. Plus, the timing is perfect for our garden, as we have 6 tomato plants FULL with tomatoes (still lots of green, so we'll be enjoying tomatoes for a while!). Today I just harvested a few handfuls of them and popped em in the oven immediately. As you'll see in the recipe, you'll need a few other things you can find in your garden (garlic is the only thing on the list that we didn't grow this year.....we didn't put the garden in until June and garlic has to be planted in October. You can bet we will have some next year - fingers crossed!). Anyway, this sauce is sooooooo good. You can put it over fresh pasta, or use it in a lasagna like I did. Enjoy!

Roasted Tomato and Garlic Sauce
  • 8-10 roma tomatoes (or whatever you have - I use a variety from the garden)
  • 1/4 of an onion, cut into large pcs
  • 3 cloves garlic, smashed
  • 1 tbsp EVOO
  • s&p
  • 10 large basil leaves (and/or fresh sprigs of thyme, oregano, etc)
  • 2 tbsp fresh parsley, chopped
1. Preheat oven to 425 degrees. Slice tomatoes in half lenghtwise and place on roasting pan, cut side up.
2. Add onion and garlic cloves to pan, then drizzle with EVOO. Sprinkle with s&p. Tuck basil leaves between tomatoes.
3. Roast tomatoes in oven for about 25 minutes, or until just starting to brown.
4. Place tomatoes in large bowl or pot and blend using an immersion blender for 30-60 seconds. Remove any large pcs of skin (if any). Stir in fresh parsley and ENJOY!

Before Roasting

After Roasting

Thursday 25 August 2011

hmmmm...

Well....umm.....I got nothing to blog about today, sorry! The one thing I made today that I could technically share the recipe for, is soooooo not healthy. I am pretty sure I gained weight just preparing it! I had an order for a dozen chocolate cupcakes filled with caramel and topped with a whipped chocolate buttercream. I "accidently" made 24 cupcakes, instead of 12......Yikes - I think any dentist will appreciate those ones. But man oh man, were they good!!!! Happy eating!

Wednesday 24 August 2011

Potato Salad

So another recipe with mayo in it. What gives, you might be asking. Well, you know when something scans at a higher than posted price at the grocery register (even if only by 10 cents) and you mention it? It of course is then looked into....and if it turns out you are right about the incorrect scanned price, many stores will then give you the item for free. This happened to me yesterday. I love a deal....I didn't plan on getting my mayo for free of course, but since I did, it makes me want to use it up and enjoy my deal. Silly, I know....but oh well. So yesterday we had our balsamic mayo on wraps. Tonight I had leftover chicken and wraps, so added some mayo and other ingredients and served up chicken salad wraps (see my recipe for a wonderful chicken salad). I whipped up some potato salad to serve alongside our wraps. YUM! Now I have to admit, at this point, I am mayonnaised out for a while! Still, this is a tasty recipe for making potato salad. Enjoy!


Jenno's Potato Salad
  • 5-6 med-lg potatoes (cut into bite-sized pcs....I prefer to not peel the thinner skinned ones)
  • 2 carrots, peeled and diced
  • 3 hard-boiled eggs, diced/crumbled
  • 1/2 cup mayo
  • 2 tsp dijon mustard
  • s&p to taste
  • 5-6 dill pickles, diced
1. In a large pot, boil potatoes and carrots until just tender (you don't want them mushy!). Cool with cold water immediately.
2. Place cooled potatoes and carrots in a large bowl. Add remaining ingredients and carefully stir to combine. Taste and season with more s&p, if needed.
3. You can chill this in the fridge before serving (will last a few days in the fridge) or serve it slightly warm. Either way - ENJOY!

Balsamic Mayo

Last night I apparently forgot to blog. I made this mayo to go with our chicken and veggie wraps.....alright, there may have been a slice or two of bacon on those wraps, too.....Anyway, I didn't want just mayo and didn't feel like ranch or something similar. I decided to make this mayo. It was VERY yummy! It works great as a wrap "sauce", so I assume equally as great on a sammie or burger, and I think would even be good as a veggie dip. It's pretty simple to make. If you want a diet friendly version, use low-fat mayo (which to me is almost an oxymoron....I'll sacrifice any diet for some mayo!). Enjoy!

Balsamic Mayo
  • 1/2 cup mayo (I like Hellmans Mayo w/ Olive Oil)
  • 2 1/2 tbsp aged balsamic vinegar
  • lots of fresh cracked pepper
1. Mix everything together in a small bowl until well combined. Serve and ENJOY!

Monday 22 August 2011

Bacon, Onion and Cream Pizza

Okay, this one isn't AS healthy, but it's better than buying a frozen pizza and/or ordering one from your local pizza parlour. And not only is it better for you, it tastes better, too! This one is delicious! Enjoy!


Bacon, Onion and Cream Pizza
  • Roughly 1/2 lb pizza dough (previous post will yield slightly more than this)
  • 1/4 lb thick cut bacon, cut into small pcs
  • 1 large red onion, thinly sliced
  • pinch of salt
  • pinch of sugar
  • 1/2 cup ricotta
  • 1/2 cup sour cream
  • 1 tbsp AP flour
  • s&p
1. Perheat oven to 425 degrees. In a large skillet, fry up the bacon until crispy. Remove from grease and set to drain on paper towel. Add onion to skillet and allow to soften. Once soft, spinkle with salt and sugar, then caramalize the onions (should take 8-10 minutes).
2. In a small bowl, whisk together ricotta, sour cream and flour.
3. Divide pizza dough into 2 pieces. Roll each piece out to roughly fit a 12" pizza pan (lightly greased). Spread half the ricotta mixture onto each pizza. Sprinkle with a little s&p. Top each with half the onions and half the bacon.
4. Bake in preheated oven for 8-10 minutes, or until crust is brown and crispy. Let cool a few minutes before serving and ENJOY!

Whole Wheat Pizza Crust

As promised, a "healthy" recipe. It was make your own pizza night at our house. We gathered a bunch of veggies from the garden and topped our pizzas. To be honest, a few pepperonis and slices of bacon were thrown in the mix, too. This pizza crust is really easy to make. You could use only AP flour, if you prefer not to make whole wheat. Enjoy!


Whole Wheat Pizza Crust
  • 3/4 cup AP flour
  • 3/4 cup Whole Wheat flour
  • 3/4 tsp instant dry yeast
  • 1/4 tsp salt
  • 1/2 - 3/4 cup warm water
  • 1 tbsp olive oil
1. In a large bowl, whisk together dry ingredients. Slowly add wet and stir until just combined. Pour onto counter and knead for 4-5 minutes (or use dough hook on mixer).
2. From dough into a ball. Lightly grease bowl, place dough inside and gently roll dough around to coat all sides. Cover and leave to rise (in microwave proofer or warm place) for 1-2 hours.
3. Preheat oven to 425 degrees. Divide dough into 3-4 pieces and roll out to form personal sized pizzas. Top as desired and bake in preheated oven for 8-10 minutes, or until brown and crispy.
4. Let cool 5 minutes before slicing, serve and ENJOY!

Sunday 21 August 2011

Brownies

I know I need to get back to posting more healthy recipes....I tend to deviate sometimes, as I enjoy posting from scratch recipes, too. Here's one for brownies (from food.com). You can add anything you want to these (chocolate chips and marshmallows are a fav....so is fresh mint from the garden), and they beat a boxed mix any day. We all are going to indulge now and then, so you might as well indulge on something you've made yourself. It tends to taste better! Enjoy!

The patty on these "burgers" is actually a brownie!

From Scratch Brownies
  • 1/2 cup butter, melted
  • 1/2 cup unsweetened cocoa
  • 1 cup sugar
  • 2 eggs
  • 2 tsp vanilla
  • 1/2 cup flour
  • pinch of salt
  • Any addition you would like!
1. Preheat oven to 350 degrees. Lightly grease an 8" square pan.
2. In a large bowl, mix together melted butter and cocoa until cocoa is dissolved. Add sugar, eggs and vanilla and mix well.
3. Finally, stir in flour and salt and mix just until you no longer see flour. Add your additions at this point, if desired.
4. Spread batter in pan and bake in preheated oven for 25 minutes. Do not overbake!
5. Let cool, cut into squares and ENJOY!

Friday 19 August 2011

Buttermilk Cornbread

I just baked 2 batches of this cornbread, to serve tomorrow at our BBQ. Guess where I found the recipe?!?! It's a keeper! Enjoy!

Buttermilk Cornbread
  • 1/2 cup butter
  • 2/3 cup white sugar
  • 2 eggs
  • 1 cup buttermilk
  • 1/2 teaspoon baking soda
  • 1 cup cornmeal
  • 1 cup all-purpose flour
  • 1/2 tsp salt
1. Preheat oven to 375 degrees. In a large bowl, melt butter, then stir in sugar. Quickly add eggs and continue to stir until well blended. Add the remaining ingredients and combine until only a few lumps remain. Pour batter into well greased 8 or 9 inch pan.
2. Bake in preheated oven for 30-35 minutes, or until a toothpick inserted in centre comes out clean. Let cool, serve and ENJOY!

Jalepeno Popper Burgers

Do I post this recipe, or don't I? If I confess to making AND eating this, will any of you think less of me and my "healthy" lectures? Hmmm.....Oh, who am I kidding. I NEED to share this recipe. It is too delicious not to. I actually made these last night, but didn't have time to write the blog. I've been making these for years now, but forgot about them recently. M suggested we give them a go again, so this was last night's dinner. They are AMAZING! Enjoy!

Jalepeno Popper Burgers
  • 1.5 lbs lean ground beef
  • 4 oz cream cheese,s oftened
  • 1/3 - 1/2 cup chopped jalepenos (depending how spicy you like things)
  • s&p
1. Heat your grill to med-high heat. Let beef come to room temp, then divide into 8 equal parts. Form and flatten each part into a thin burger patty.
2. In a small bowl, mix together cream cheese and jalepenos. Place 1/4 of the mixture in the centre of one of the patties, then top with another patty. Pinch the sides together, so the cream cheese is fully enclosed. Repeat 3 more times. Sprinkle each buger with a little s&p.
3. BBQ the burgers for about 10 minutes, flipping a few times. Remove from the grill when the meat is no longer pink. Serve and ENJOY!

Thursday 18 August 2011

Apple Pie

I know I just made a pie last week, but since I still had the other half of the dough recipe in the fridge, and since a certain someone has been requesting apple pie for a LONG time, I thought I better make one today. If you are lucky enough to live near an apple orchard (we do!), you'll be noticing that apples are starting to come in season. As soon as you can get your hands on some fresh, local apples, give this recipe a try. It's wonderful! Enjoy!


p.s. I do not have shares in allrecipes.com, I swear.....but yet again, that's where I found this recipe!

Apple Pie
  • 1/2 pie crust recipe (see recipe for pate brisee)
  • 6-8 apples, peeled, cored and thinly sliced
  • 1/2 tsp cinnamon
  • 1/2 cup butter
  • 1/4 cup flour
  • 1/4 cup water
  • 1/2 cup white sugar
  • 1/2 cup brown sugar
1. Preheat oven to 350 degrees. Roll pate brisee out to form bottom crust of pie. Place in 8 or 9 - inch pie plate. Roll the remainder of the dough into a rectangle and cut into strips using a pizza cutter.
2. Place sliced apples in pie plate and sprinkle with cinnamon.
3. In a small saucepan, melt butter, then add flour, whisking frequently to form a thin paste. Add water and sugars, and continue to whisk frequently. Let simmer for 2 minutes, then pour half the mixture over the apples in the pie dish. Place the saucepan back on the stove over low heat.
4. Form the lattice over the top of the pie plate, then pour the remaining butter/sugar mixture over top.
5. Place the pie in the preheated oven, making sure you put a cookie sheet underneath to catch any drippings. Bake pie for 45 minutes (keep an eye on the crust to ensure it isn't browning too quickly). After 45 minutes, turn oven off, but leave pie in the oven for 1-2 hours, or until ready to serve. (If you aren't serving the same day, after 2 hours remove the pie and cover.) ENJOY!

Wednesday 17 August 2011

Saucy Sausage Mac and Cheese

It's a week of pasta in our house, apparently. The boys request cheesy noodles on a weekly basis and yesterday I made WAY too much. I hate to see leftovers go to waste, so I modified the leftovers to create a dish we'd all equally enjoy. Waste not want not! Enjoy!


(BBQ) Saucy Sausage Mac ' n ' Cheese
  • 1 lb sausage meat (mild italian, chorizo, etc), crumbled
  • 1 tomato, diced
  • 1 cup of your favourite BBQ sauce
  • 4 cups cheesy noodles (mac and cheese - see recipe on blog)
  • 1/2 cup shredded sharp cheddar
1. In a large skillet, brown crumbled sausage until fully cooked. Add tomato and continue heating on med-high for 1 minute before adding BBQ sauce.
2. Stir sauce then fold in cheesy noodles. Heat until noodles are warm throughout.
3. Top noodles in skillet with shredded cheese and allow to melt. Serve and ENJOY!

Tuesday 16 August 2011

Goat Cheese Alfredo

We had plenty of leftover chicken from last night's roasted bird, so I was trying to come up with something to have for dinner tonight that would use up the chicken. We also had half a log of goat cheese, so I immediately thought pasta. I threw this together and man oh man was it good. Okay, NOT healthy, no, but better for you than the jarred alternative (and cheaper than going out!). Enjoy!


Goat Cheese Alfredo
  • 1/2 stick butter (4 tbsp)
  • 4 oz cream cheese (1/2 a brick)
  • 2 garlic cloves, minced
  • s&p
  • 1 cup milk
  • 1/2 cup half and half cream
  • 2 oz goat cheese
  • 1/2 - 3/4 lb cooked pasta (linguine noodles was my choice)
  • 1 cup cooked chicken, shredded
1. In a large saucepan over med-high heat, melt butter and cream cheese together. Try to whisk as smooth as you can. Add garlic, and allow mixture to lightly brown (stir frequently for about 5 minutes). Sprinkle with a little salt and a lot of pepper (fresh cracked, of course!).
2. Slowly whisk in milk and cream, and again try to make sauce smooth. Keep heat on med, but watch the sauce doesn't boil. After 5 more minutes, add goat cheese and stir until evenly blended.
3. Put chicken and noodles in pan and gently toss to evenly combine. Once chicken is warm, serve and ENJOY!

Monday 15 August 2011

Quinoa Side Dish

I have been wanting to try quinoa for quite some time, so finally decided tonight was the night (served along side our roasted chicken). I found this recipe on allrecipes.com (ha), and sure am glad I did. After a few modifications to suit our personal preferences, it was delicious! I will definitely make this again. Enjoy!

For those not familiar with quinoa and it's health benefits, here's a quick tidbit for you:
"In addition to protein, quinoa features a host of other health-building nutrients. Because quinoa is a very good source of manganese as well as a good source of magnesium, iron, copper and phosphorus, this "grain" may be especially valuable for persons with migraine headaches, diabetes and atherosclerosis."


Quinoa Side Dish
  • 1 tablespoon butter
  • 1 cup uncooked quinoa
  • 1/2 small onion, finely chopped
  • 1 garlic clove, finely chopped 
  • 2 cups vegetable (or chicken) broth
  • 2 tablespoons chopped fresh parsley
  • 1/4 teaspoon salt
  • 1 dash fresh lemon juice
1. Melt butter in a saucepan over medium heat. Add the quinoa, and toast, stirring occasionally, until lightly browned, about 5 minutes. While quinoa is browning, add onions, than garlic, allowing them to soften as well (add garlic with about 30-60 seconds left). Stir in broth, and bring to a boil. Reduce to a simmer, cover, and cook for 15 minutes, or until quinoa is tender.
2. In a bowl, toss quinoa together with parsley, salt, and lemon juice. Serve and ENJOY! 

Lemon Basil Roasted Chicken

It seems odd to turn the oven on for an extended period of time in the middle of summer, but I had a hankering for roasted chicken, so decided it was worth it. The boys and I grabbed a handful of basil leaves out of the garden (among other veggies to serve alongside our chicken), quartered a lemon, stuffed it in the bird and popped 'er in the oven. We ate our own fresh broccoli, peas, and carrots with the chicken (along with quinoa - see other recipe post from today). Such a healthy, delicious dinner. Go ahead and roast a chicken this summer, too. YUM! (and remember, go for the free-range, horomone-free bird from your local farm, when choosing your chicken!). Enjoy!


Lemon Basil Roasted Chicken
  • 1 small chicken (2-4 lbs), giblets and gizzard removed
  • 1/4 of a lemon
  • 10-12 basil leaves
  • s&p
1. Preheat oven to 325 degrees (convection roast if you have it). Place chicken in small roasting pan, breast side up. Stuff lemon and basil into cavity of bird. Sprinkle chicken with s&p.
2. Roast chicken in preheated oven for 30-40 minutes per pound, or until juices run clear when sliced (you could also use an oven thermometor and remove chicken when leg joint reaches 165 degrees).
3. Remove from oven and tent bird with foil for 10 minnutes. Carve and serve. ENJOY!


Saturday 13 August 2011

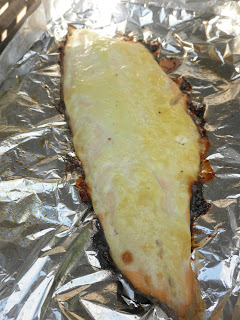
Grilled Honey Mustard Rainbow Trout

It was a dinner of grilling tonight. This is a recipe I found for the trout. I got it from my most useful site (allrecipes.com...I modified it slightly). It was sooooooo tasty. We all wished there was more! Enjoy!


Grilled Honey Mustard Rainbow Trout
  • 3 tbsp mayo
  • 2 tsp mustard
  • 2 tsp honey
  • 2 tsp cider vinegar
  • pinch cayenne pepper
  • 4 rainbow trout fillets
1. Fire up your grill to med-low heat. Lightly grease 4 sheets of tin foil (each large enough to hold a fillet).
2. In a small bowl, mix together first 5 ingredients. Place a filet on a sheet of foil, then top with 1/4 of the mustard sauce. Repeat with other fillets.
3. Place each pc of foil on grill and close the lid. Cook for 5-8 minutes, or until fish flakes easily with a fork. Serve and ENJOY!

Garlic Grilled Taters

I wanted to make some BBQ'd potatoes to go with our BBQ'd green beans. I had the garlic out, so thinly sliced a few cloves, as well as thinly sliced some onion fresh out of the garden, and put it all together to create these. SOOOOOOOOOO yummy! Enjoy!


Garlic Grilled Taters
  • 3 med-large potatoes, thinly sliced
  • 1 small onion, thinly sliced
  • 2 cloves garlic, thinly sliced
  • s&p
  • 2 tbsp butter, divided into 3 parts
1. Fire up the BBQ to med heat. On a large pc of tinfoil, place one of the potatoes (sliced) forming an even layer.
2. Top the layer with half of the onion and one of the garlic cloves (sliced). Sprinkle with s&p, then dot with 1/3 of the butter.
3. Place another sliced potato on top, forming another layer, and repeat step 2. Top with 3rd sliced potato, and dot with remaining butter. Fold foil around potatoes, forming a tighly sealed pouch.
4. Place foil pouch on grill, close lid and leave for 30 minutes. Once fully cooked, serve and ENJOY!

Green Beans on the BBQ

We picked an abundance of beans out of the garden today. I am not a huge fan of green beans, so I was looking for a recipe that would give them some extra flavour. I found this one (I also wanted one I could do on the grill). These were delicious! I hope we get enough beans in our 2nd picking to enjoy these again! Enjoy!


Green Beans on the BBQ
  • 1/2 lb green beans, washed and trimmed
  • 1/2 tbsp EVOO
  • 1 garlic clove, mined
  • 1/2 tsp red pepper flakes
  • s & p
  • 1 tbsp water
1. Fire up your BBQ to med-high heat. Place green beans in centre of large sheet of tin foil. Drizzle beans with oil, then add the remaining ingredients. Fold tin foil tightly, to form a pouch around the beans.
2. Place foil pouch directly on grill, close lid, and leave for 15-20 minutes.
3. Remove from pouch and serve immediately. ENJOY!

Thursday 11 August 2011

Mexican Skillet Casserole

I made this for dinner last night. I wasn't sure what to call it, but the name I chose seems fitting enough. We had a package of ground beef in the fridge that I needed to cook. I wanted to try something different, so this is what I made. Everyone really enjoyed it! It is a pretty versatile recipe, so feel free to alter it as you desire. Enjoy!

Mexican Skillet Casserole
  • 1.5 lbs ground beef
  • 1/2 tsp garlic salt
  • 1/2 tsp chili powder
  • 1/2 tsp dried orgeano
  • 1/2 tsp red pepper flakes
  • 1/4 tsp cumin
  • fresh cracked pepper
  • 1/2 small onion, diced
  • 1 small can diced tomatoes
  • 1 cup black beans (drained and rinsed)
  • water
  • 1 cup instant rice
  • 1/4 lb cheddar cheese, shredded
  • OPTIONAL garnish - lettuce, salsa, tomatoes, sour cream, jalepenos, etc
1. Place ground beef in a large skillet over high heat. Once browning begins, sprinkle meat with garlic salt, chili powder, oregano, red pepper flakes, cumin and pepper. Stir meat frequently while it browns.
2. When meat has only a little bit of pink left, add diced onion to the skillet. Once meat is fully browned, drain any excess fat.
3. Strain diced tomatoes over a small bowl and reserve liquid. Add tomatoes to skillet, as well as the black beans.
4. Add enough water to reserved tomato liquid to equal 1 1/2 cups. Pour into skillet, then pour in instant rice. Stir to evenly combine, then cover and leave on med-low heat for 5-7 minutes, or until rice is soft.
5. Remove cover and sprinkle rice/meat mixture with cheddar cheese. Allow cheese to fully melt before serving. ENJOY!

Wednesday 10 August 2011

Peach Raspberry Pie

The boys and I went to the local produce stand (the "Fruit Lady" as we call her), and picked up some freshly picked fruit today. Our choices were peaches and raspberries. I knew I wanted to make a peach pie and the boys suggested the addition of the raspberries. Worked for me! Since today isn't too hot to bake, we made this pie a few hours before dinner (it went in the oven 2 hours before dinner). Served still warm with a scoop of ice cream - this pie is DELICIOUS!!! Fresh, local, and homemade. YUM! Enjoy!


Peach Raspberry Pie
  • 1/2 batch pate brisee (see recipe on blog)
  • 6 large peaches, peeled and sliced
  • 1/4 cup AP flour
  • 1/2 cup white sugar
  • 1/2 cup brown sugar
  • 1 tbsp cornstarch
  • 1/2 tsp cinnamon
  • 1/2 pint fresh raspberries
1. Preheat oven to 450 degrees.
2. Roll pate brisee to fit 9" pie dish. Gently push dough down to ensure there is no air under the bottom crust. Roll excess dough into a large rectangle. Cut into strips using a pizza cutter. These will be used to form your lattice top.
3. In a large bowl place peaches, flour, sugars, cornstarch and cinnamon. Gently toss to combine. Pour peaches over dough in pie dish. Top with raspberries.
4. Place strips of dough 1/2" apart across crust. Repeat with another layer, perpendicular to the first. Press the entire edge of the pie using a fork. Trim any excess dough.
5. Bake pie in oven at 450 degrees for 15 minutes, then turn temperature to 350 degrees and bake another 30 minutes. Turn oven off and leave pie to sit in the warm oven for 1-2 hours. Remove, serve and ENJOY!

*If your crust is starting to get too dark on the edges, place tin foil over it (edges only) *

Yikes!

No, I haven't forgotten about this blog. I have just been away (again!) on a little holiday. I am home now and will return to the world of recipe blogging shortly......I'm thinking a peach pie is in our future!!!

Saturday 6 August 2011

Catalina Salad Dressing

I was searching for a new salad dressing today, that was different from the usual oil/vinegar combos I usually make. While I enjoy those, M doesn't always. He really likes russian and catalina dressing, so I searched for a recipe to make it myself. Here is what I found (from you know where!!! - allrecipes.com). I will post it as I made it, which is slightly different than what called for. You will see I used half an onion and I personally think this is too much (the original called for a whole onion). I guess it will depend how much you like an onion taste in things. Even still, this was very good, served over a salad made from veggies primarily from the garden!


Catalina Salad Dressing
  • 3/4 cup white wine vinegar
  • 1/2 cup white sugar
  • 1/2 cup ketchup
  • 1/2 teaspoon salt
  • 2 teaspoons Worcestershire sauce
  • 1/2 onion, chopped
  • 3/4 cup EVOO
1. Place all ingredients in a blender and mix until combined and onion is nothing more than tiny bits (about 30 seconds). With blender still running, stream in oil and mix for another 30 seconds.
2. Chill until ready to serve. ENJOY!

Sloppy Joe's!

This is my recipe post for Thursday. I didn't get it posted, apparently. Yesterday I was tending to a sick little boy, so no recipe for Friday. I will post today's recipe later....I hope!

Anyway, sloppy joe's are a fun meal, for kids and adults. If you skip on buying the canned sauce, then it isn't a terrible meal to enjoy now and then. Here's my recipe for homemade sloppy joes. The boys really enjoyed how "sweet" the meat was. I served these as open face sammies, over homemade bread. Enjoy!


Jenno's Sloppy Joe's
  • 1.5 lbs lean ground beef
  • 1/2 onion, minced
  • 3/4 tsp garlic salt
  • 1/2 tsp chili powder
  • 1/2 tsp red pepper flakes
  • 1/4 tsp cumin
  • fresh cracked pepper
  • 1 cup ketchup
  • 3 tbsp brown sugar
1. In a non stick skillet over med-high heat, begin to brown beef. Once it's about half-way cooked, add onion and stir frequently. Before the meat is fully browned, sprinkle meat with garlic salt, chili powder, pepper flakes, cumin and pepper.
2. Once meat is fully cooked, add ketchup and brown sugar to pan. Stir to evenly coat. Allow mixture to cook/warm on med-low heat for another 5-10 minutes, to ensure it's warm throughout.
3. Serve on buns or over bread. ENJOY!

Wednesday 3 August 2011

Pork Skewers

Butterflly chops were on sale this week at the butcher and they looked too good to resist. You may (or may not) recall me mentioning that my husband is not a big fan of pork chops. Nor am I for that matter....Anyway, I couldn't pass these chops up (1 lb per chop at $2 per pound...all meat!), so I had to come up with another way to serve them. Here was my solution. Little D helped make these. I love to get the kids involved and give them options. He would choose from 2 ingredients, and we'd add his choice (sometime with a little coaxing :). This is what we came up with. They tasted great! Enjoy!

p.s. Some advice from Little D - don't lick the spilt ground ginger. It's "hoooooooooooooooooot and spicy" ;)


Little D's Pork Skewers
  • 2 lbs pork, cut into cubes
  • 1/4 cup brown sugar
  • 2 tbsp soya sauce
  • 1 tbsp EVOO
  • 1 tbsp white wine vinegar
  • 1/2 tsp ground ginger
  • 1/4 tsp garlic salt
  • 1/4 tsp fresh cracked pepper
  • 1/4 tsp red pepper flakes
1. Place all ingredients into a large ziplock bag or a resealable container. Seal it tight and then give it a good shake. Keep shaking until all ingredients are evenly covering pork.
2. Place pork in fridge for at least 2 hours before grilling.
3. Fire up your grill to med-migh heat. Slide marinated pork cubes onto bamboo skewers that have soaked in water (or stainless ones).
4. Place on grill and cook for 8-10 minutes, turning frequently. Remove from grill once pork is fully cooked. Serve immediately as is or over rice. ENJOY!

Tuesday 2 August 2011

Tomato Feta Salad

This salad recipe is very similar to my other one (tomato, cucumber, feta salad), but at the same time it is very different. I got this recipe from foodnetwork.com. It's by Ina Garten. We really, really liked it. Enough so that I felt I should post it on here. Plus - we made this almost entirely from items found in our garden! Double healthy bonus :) Enjoy!


Tomato Feta Salad
  • 1 pint grape or cherry tomatoes
  • 1/4 pound good feta cheese, crumbled
  • 1/4 small red onion, finely chopped
  • 1 tablespoons white wine vinegar
  • 2 tbsp EV olive oil
  • fresh cracked s&p
  • 1 tablespoon minced fresh basil leaves
  • 1/2 tablespoon minced fresh parsley
1. Cut the cherry tomatoes in half and place them in a large bowl. Add the feta to the tomatoes and then add the onion, vinegar, olive oil, salt, pepper, basil, and parsley.
2. Toss carefully and add more salt/pepper, if desired.
3. Serve chilled or at room temperature (I prefer it served immediately, at room temp). ENJOY!

Goat Cheese and Ham Omelette

Here's a recipe for a quick and healthy breakfast or dinner. Enjoy!


Goat Cheese and Ham Omelette
  • 2 tsp butter
  • 1 shallot, minced
  • 5 free range eggs
  • 1/4 cup milk
  • s&p
  • 1/3 cup ham, diced
  • 1 tbsp fresh parsley, chopped fine
  • 2 oz goat cheese
1. In a large non-stick skillet over med-high heat, melt butter. Add shallots and let soften (this will only take about 30 seconds).
2. In a large, pourable bowl, whisk together eggs, milk and s&p. Pour mixture over softened shallots.
3. Let mixture set in pan about 1 minute before adding ham and parsley on top. After another few minutes, when eggs are almost all set, carefully flip eggs over to cook the other side. Leave for another minute, then place the goat cheese evenly over half of the eggs. Fold over the other half, to form the omelette.
4. Leave eggs in pan for 1-2 minutes, or until goat cheese is melted and creamy.
5. Remove from pan, serve immediately, and ENJOY!

Monday 1 August 2011

Dinner on the Campfire!

Last night we had a backyard campout. The boys love sleeping in the tent. They also really like to eat food made on the campfire. M just got a Pie Iron for his birthday, so we decided to put it to use. We made pizza sammies. They were pretty tasty! If you don't know what a Pie Iron is - google it! I didn't know what it was until he received it. What a versatile cooking tool. All you need is one of these and a big imagination! We will be making plenty of meals in this, that's for sure (might even have to invest in a 2nd one). Happy camping and happy cooking. Enjoy!


Campfire Pizza Sammies
  • 1  loaf Italian bread, uncut
  • 8 slices (real, not processed) mozzarella
  • 32 slices pepperoni
  • 1/2 cup (ish) pizza sauce
  • Veggies (whatever you like on your pizza - optional)
1. Get your campfire real hot (start it about 30 minutes before cooking). Make sure your pie iron is seasoned, then place in the fire to get hot (about 15 minutes).
2. Slice loaf in half lengthwise, then slice each half into 8 pcs (easier if you put it back together after 1st slice).
3. Take 1/8th of loaf and place a little dollop of pizza sauce on each pc (cut side in). Top with cheese, pepperoni and veggies. Close sandwich, then place in pie iron. Clamp shut and place in campfire. Let cook 1-2 minutes in fire.
4. Remove from pie iron, let cool slightly, serve and ENJOY!