Tuesday 31 May 2011

Pulled Pork Hash

Yesterday I cooked up a couple of pork chops in the slow cooker (added a little water and homemade BBQ sauce, then cooked on low for 7 hours ish), and turned them into pulled pork. M is not big on straight up pork chops, so I thought I would try to cook them this way and it worked! You could tell they were leaner than normal pulled pork, but not in a bad way. We ate the meat on buns - YUM! Tonight I was trying to come up with something to make with the leftover pork. I was debating between pasta or a hash type meal. I decided to go with the hash - good choice! This meal is quick, easy, uses up leftovers (you can subsititute the pork for whatever meat you have kicking around in the fridge - chicken, sausage, etc), and viturally foolproof. Plus - you can modify it to whatever you feel like throwing in the pan. Start with an onion, some potatoes, leftover meat, then go from there. Use your imagination with this one. Open the fridge, scour for possibilites and before you know it, you'll have a delicious homemade dinner on the table. Enjoy!

**NO picture - another meal devoured before I remembered the camera**

Leftover Meat Hash
  • 1 tbsp butter
  • 1/2 onion, diced
  • 1/2 each red and orange pepper, diced
  • 2 large potatoes, diced
  • 1-2 cups leftover meat
  • sprinkle garlic salt
  • fresh cracked pepper
  • few splashes hot sauce (*optional)
  • 1/4 cup BBQ sauce or condiment of choice (that compliments the meat...you might want extra if your leftover meat doesn't already have some saue)
1. In a cast iron skillet, melt butter over medium heat. Add onion and peppers and cook until soft. Toss in potatoes, cover, and cook about 7-8 minutes, or until potatoes are soft (stirring every 1-2 minutes).
2. Remove cover and add meat. Stir to combine, then season with desired garlic salt, pepper, hot sauce, etc.
3. Turn heat to med high and push mixture down in pan. Cook for 2 minutes and stir (the bottom will be starting to crisp). Repeat this step 4 times or so.
4. Once you have your desired crispness, remove from heat and serve immediately. ENJOY!

Monday 30 May 2011

Bechamel Sauce

Bechamel Sauce is pretty simple (and easy) sauce, yet a wonderful addition to many meals. The sauce especially compliments eggs. A favourite meal in this house is Croque Madames. YUM! I had leftover pancakes from yesterday morning, so for a quick meal I heated them up, topped with with a once over easy egg, then topped everything with some bechamel sauce. Not exactly a diet-friendly meal, but homemade and delicious! Here's the recipe for the sauce. Enjoy!

Bechamel Sauce
  • 2 tbsp butter
  • 2 tbsp flour
  • 1 1/2 cups milk
  • fresh cracked s&p
  • 1/4 tsp fresh grated nutmeg
1. In a small sauce pan over med-high, heat butter until fully melted. Add flour and immediately whisk together. Continue heaitng for 1-2 minutes, until mixture is smooth, bubbly and golden.
2. Slowly pour in milk, and continuously stir until sauce starts to thicken.
3. Add s&p and nutmeg, then stir to combine. Lower heat, then keep sauce on stovetop a few more minutes, until thick and creamy (stir every 30 seconds or so).
4. Remove from heat and serve immediately. ENJOY!

Sunday 29 May 2011

Homemade Waffles

This morning we debated over pancakes or waffles for breakfast (well, the boys were debating). Waffles won out, so we tried a new recipe for them with the new waffle maker. They turned out great! This is a recipe I will definitely use again. For a healthier version of this recipe, you could easily substitute the all purpose flour with whole wheat, and use apple sauce in lieu of the oil. Top with fresh fruit and you have an excellent breakfast (lunch or dinner!). Enjoy!

Homemade Waffles
  • 2 eggs, separated
  • 1 3/4 cups milk
  • 1/2 cup vegetable oil
  • 2 cups AP flour
  • 1 tbsp white sugar
  • 1 tbsp brown sugar
  • 4 tsp baking powder
  • 1/2 tsp cinnamon
  • 1 tsp vanilla
1. Separate eggs between 2 large bowls. Using a hand mixer, beat eggs white until light and fluffy (and stiff), then set aside.
2. Beat eggs yolks until fluffy. Add the rest of the ingredients to the egg yolks and beat just until smooth.
3. Fold egg whites into batter until just combined.
4. Pour 1/4 cup of batter (per waffle) onto lightly greased waffle iron. Cook until golden brown. Serve immediately and ENJOY!

Saturday 28 May 2011

Strawberry Filling

Today I made a cupcake order for a dozen 'Strawberries and Cream' cupcakes. YUM! I made vanilla cupcakes, filled them with this strawberry filling, then topped them with a whip cream icing. They were delicious - says me AND the girl who ordered them. I thought I would share the filling recipe on here. You could easily use this between layers of a cake, on a cheesecake, on ice cream, or for anything else you can think of! The best way I can describe this filling would be that it's the middle line between strawberry jam and strawberry jello. It's firm enough to not run away on you, yet smooth and the right consistency to pair with cake. The basis of this recipe is quite simple and you could make it with any fruit, really. I know I'll be trying this with blackberries, for a summery cheesecake topper! Enjoy!

Strawberry Filling
  • 1/2 lb fresh, ripe strawberries
  • 1/4 cup white sugar
  • 1 tbsp gelatin
  • 1 tbsp warm-to-cold water
  • 1 tbsp boiling water
1. Cut strawberries up into tiny pcs. Sprinkle with sugar, stir, then set aside for a few minutes.
2. In a small bowl, measure cold and hot water, then sprinkle gelatin on top. Allow the gelatin to fall to the bottom before stirring. Give a quick whisk to ensure the gelatin is dissolved, then pour over strawberries and combine.
3. Set filling in fridge, covered. After 10 minutes, stir again, then place back in fridge (covered). After another 10 minutes, stir, and then your filling should be ready to use! ENJOY!

Friday 27 May 2011

Kiwit Beer

It's Friday!!! The week-end is here....as is the summer (almost). Today's post is for something that goes hand-in-hand with summer week-ends - cold, refreshing beer! I'm not the only one who likes to make things from scratch in this house. My husband is on a beer making kick. He's tried a few different types, with the latest (still fermenting) being Kiwit - a white beer flavoured with kiwi. We brewed this beer on Monday (Victoria Day) and hope to bottle it in about 2 more weeks. So far the fermenting process is going well, and it looks and smells promising. Mike insisted that I post a beer recipe, so since this one has fruit in it, it's going to make the blog :)


Kiwit Beer
  • 5 gallons cold water
  • 1/2 lb Torrified wheat grain
  • 1/2 lb 6 row brewers malt
  • 2 tsp gypsum
  • 6.6 lbs wheat-barley liquid malt extract
  • 1 ounce Tettnanger hop pellets
  • 1/2 ounce Willamette hop pellets
  • 1/2 ounce crushed coriander
  • 1 tsp Irish moss
  • 4.5 lbs fresh kiwi, peeled and cubed
  • 1 pack Wyeast 3944XL (Belgian Wit)
  • extra water to fill carboy to 5 gallon mark
  • 5 ounces priming sugar (for bottling)
1. If you are actually going to brew this beer and don't know how, leave a comment and I will post the step-by-step :) Cheers!

Feta and Asparagus Quiche

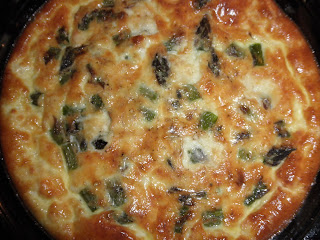
I've been offline for the last 2 days due to a wonderful visit with my sister and cousin (and all 6 kiddos!). I wasn't able to post, so catching up today. Here's a recipe for one of the crustless quiches I brought for lunch yesterday. It was quite tasty! Enjoy!


Feta and Asparagus Quiche
  • 3 ounces feta cheese, crumbled
  • 5 asparagus, cut into 1/2" pcs
  • 3 eggs
  • 1 cup half and half
  • pinch dried parsley
  • s&p
  • few dollops of butter
1. Preheat oven to 350 degrees. Lightly grease pie plate.
2. Evenly place crumbled feta and asparagus pcs in pie plate.
3. In another bowl, whisk together eggs, cream, and parsley. Pour into pie plate over feta and asparagus. Sprinkle egg mixture with s&p, then dollop with butter (totalling about 1/2 tbsp).
4. Bake quiche in preheated oven for 40-50 minutes, or until egg is set and starting to brown.
5. Remove from oven and allow to cool a few minutes before slicing. ENJOY!

Wednesday 25 May 2011

Slow Cooked Maple Glazed Ribs

Mmmmmmmmmmmmm, ribs!!! Here's a recipe for some fall off the bone, deliciously sweet and sticky ribs. The sauce is easy to prepare and the cooking method is fool proof for tender meat. Give these a try and I bet you'll be glad you did! Enjoy!


Slow Cooked Maple Glazed Ribs
  • 3 lbs back ribs, trimmed
  • 3/4 cup maple syrup
  • 1 tbsp apple juice
  • 1 tbsp rice wine vinegar
  • 2 tbsp brown sugar
  • 1/2 tbsp worcestershire
  • 1/2 tsp dry mustard
  • s&p
1. Preheat oven to 300 degrees.
2. In a small saucepan, combine all ingredients (except the ribs) and simmer on med-low for 5 minutes.
3. While sauce is simmering, place trimmed ribs in 3 foil packs (1-lb per pack), leaving the tops open.
4. Pour 1/4 of the sauce over each pound of ribs, then seal pack shut (double wrap if you have to). Reserve the last 1/4 of the sauce for later.
5. Place wrapped ribs in oven dish and place in preheated oven. Cook for 2.25 hours. After 2.25 hours, remove ribs from oven and turn heat to broil. Open the foil packs and top all ribs with a little more sauce. Place OPEN packs back in oven and broil for 5 minutes.
6. Remove from oven, serve and ENJOY!

Tuesday 24 May 2011

Baked Asiago Perch Filets

Another fish recipe! This one is for fresh Lake Erie Perch. (I wish I could say we caught the fish, but nope). The just of this recipe comes from Taste of Home (it is called Parmesan Baked Perch). It got a lot of positive reviews, so I thought I'd try it, but we certainly wouldn't give it 5 stars. All in all, it wasn't bad, just not one I would make often. I guess it's a matter of personal tastes. If your fish filets are thin, turn the oven temp down to about 450. I hope with all these fish recipes I'm posting, some of you are getting fish into your weekly, bi-weekly or at the very least monthly meal cycle! Enjoy!


Baked Asiago Perch
  • 1/2 lb perch fillets, skin removed
  • 1 1/2 tbsp dry bread crumbs
  • 1 1/2 tbsp finely grated asiago cheese (or Parmesan)
  • 1/2 tbsp paprika
  • 1/2 tsp dried basil
  • 1/4 tsp fresh cracked pepper
  • 1 tbsp butter
1. Preheat oven to 500 degrees.
2. In a bowl, mix together bread crumbs, asiago, paprika and basil.
3. While oven is heating, place 1 tbsp butter in baking dish and place in oven until just melted. Remove pan from oven and carefully dip perch filets in melted butter.
4. After dipping filets in butter, dip them into the crumb mixture to evenly coat. Place coated filets back in buttered baking dish.
5. Bake in preheated oven for 10-12 minutes, or until fish flakes easily with fork. Serve immediately. ENJOY!

Cucumber, Tomato and Feta Salad

Here is a nice, fresh salad that goes great with any BBQ (or any meal, for that matter). It is simple, delicious, and healthy! My boys even love this one! Enjoy!

Jenno's Cucumber, Tomato and Feta Salad
  • 1 pint grape tomatoes, rinsed and halved
  • 1/2 english cucumber, washed and diced
  • 1/5 lb feta cheese, crumbled
  • 1 1/2 tbsp EVOO
  • 1 tbsp balsamic vinegar
  • s&p to taste
1. In a med size bowl, place all ingredients and gently toss to combine. Serve immediately or store in fridge until ready. Best if served the same day you make it. ENJOY!

**I couldn't get on blogger last night, so this recipe is Monday's**

Sunday 22 May 2011

Deviled Quail Eggs

I know I did deviled eggs not that long ago, but it just so happens that this is really the only thing I made today that I can blog about. And since they are so darn cute and tasty, I thought I'd post them. I made these to go along with a dainty tea luncheon following my neice's baptism. It was a wonderful day, and a great meal. I buy quail eggs at a local farm. If you can get your hands on them, try them. They are great - deviled or just fried! We eat them sunny side up quite often. Enjoy!

p.s. Credit deserves to be given to my hubby for coming up with the suggestion of turning quail eggs into deviled eggs (last time I made regular ones).

Deviled Quail Eggs
  • 18 quail eggs, hardboiled and peeled (boil about 5 minutes)
  • 2-3 tbsp mayo (give or take to your desired creaminess)
  • 1/2 tsp dijon mustard
  • 1/2 tsp rice wine vinegar
  • s&p to taste
1. Slice eggs in half lengthwise. Scoop out yolks and place in bowl (set whites aside).
2. Mash yolks in bowl, with mayo, vinegar, mustard and s&p.
3. Carefully spoon yolk mixture back into eggs whites. Refrigerate until serving. ENJOY!

*Be very careful when peeling these delicate eggs. The whites will be super thin in spots and will want to peel away with the shell.*

*I didn't get a good picture, sorry!*

Saturday 21 May 2011

Maple Dill Carrots

I found this recipe online recently and had to try it. I modified it slightly to suit our tastes. These make a great HEALTHY sidedish. Enjoy!


*Fact of the day - among other benefits, a single carrot will supply all your vit A needs for the whole day!*

Maple Dill Carrots
  • 3 cups organic carrots, peeled and chopped
  • 2 tbsp butter
  • 1 tbsp brown sugar
  • 2 tbsp maple syrup
  • 3/4 tsp dill weed
  • s&p to taste 
1. Steam carrots until tender.
2. In sauce pan, melt butter with brown sugar, maple syrup, dill and s&p. Toss in carrots to coat. Cook on med heat for about 5 minutes, or until sauce slightly thickens and coats carrots.
3. Serve immediately. ENJOY!

Friday 20 May 2011

Summer Salad w/ Orange Balsamic Dressing

I wasn't sure what to call today's recipe. It's a nice fresh salad, combining fruit with lettuce - YUM. You could add other fruit and/or veggies. Just use whatever you have on hand. The dressing is especially yummy! Enjoy!

Summer Salad
  • 1 organic romaine heart
  • 1/2 pint blueberries
  • 1 granny smith apple, cored and diced
  • 2 tbsp sunflower seeds
  • Orange Balsamic Dressing (recipe below)
1. Wash and chop lettuce, then arrange on 2 plates. Split the other ingredients between the 2 salads, drizzle with dressing, eat and ENJOY!

Orange Balsamic Dressing
  • 1/4 cup Balsamic vinegar
  • 1/2 cup EVOO
  • 1/2 tbsp brown sugar
  • 2 tbsp orange juice
  • s&p to taste
1. Place all ingredients in a mason jar and shake vigorously. Serve over salad immediatey after shaking. You can chill this, then reshake before pouring. ENJOY!

Thursday 19 May 2011

Apple Brie Pizza

Tonight was homemade pizza night and I made an apple and brie pizza as our appetizer. It was delicious. I'm short on words tonight, so here's the recipe. Enjoy.


Apple Brie Pizza
  • 1 homemade pizza crust (see recipe from March 19th - use 1/3 of dough)
  • 1-2 tbsp EVOO
  • 3/4 wheel brie (this just happened to be how much I had)
  • 1 granny smith apple, cored and thinly sliced
  • drizzle balsamic vinegar
1. Preheat oven to 400 degrees. Lightly grease pizza pan and roll out dough to fit pan.
2. Pour oil on top of uncooked crust and using the back of a spoon, make sure oil is spread evenly all over.
3. Cut brie into chunks (rind removed) and scatter over dough. Place apple slices on top. Finally, drizzle everything with a litte balsamic vinegar.
4. Bake in preheated oven for about 10 minutes, or until cheese is melted and bubbly and crust is fully cooked.
5. Let cool 2 minutes before slicing and eating. ENJOY!

Wednesday 18 May 2011

Crock Pot Whole Chicken

Today's "recipe" is more like a guideline on a super fast way to cook a whole chicken. The results are moist, delicious chicken, every single time! You can throw the chicken in before work, then come home to the wonderful aroma of it cooking and dig in in no time. This also makes for an easy week-end supper. Tonight I will serve the chicken with roasted potatoes, roasted cauliflower and steamed carrots. YUM! Remember, when buying your chicken, if you can get your hands on a free range, naturally fed chicken, BUY IT! Skip the one that's been pumped full of antibiotics, steroids, hormones, sodium, and water. The extra cost is worth it, for your health and the taste! Enjoy!

p.s. I am posting this mainly because I have been asked by a handful of people in the past how to cook a whole chicken in the crockpot. Hopefully today's post will inspire others to serve chicken this way.

Crock Pot Whole Chicken
  • 1 free-range chicken (3-5 lbs)
  • 1/2 lemon
  • 1-2 tbsp Montreal Chicken spice
  • 1/2 - 3/4 cup water
1. Place chicken in crock pot. Squeeze lemon juice over chicken. Sprinkle with chicken spice. Add enough water to the crock pot, so the bottom is covered and it's about 1/2" up the chicken (don't pour the water over the chicken, or your spice will wash off).
2. Cook chicken on low for about 8 hours (give or take....10 won't hurt it!).
3. Carefully remove cooked chicken from crock pot. Chances are it will be falling apart, since the meat will be so tender and juicy. Serve and ENJOY!

Tuesday 17 May 2011

Honey Oatmeal Sunflower Muffins

Tonight's recipe comes from canadianliving.com. I was looking for a healthy muffin recipe and came across this one. I tweaked a few things, to my own preference, and here is the result. These make a great snack or a quick breakfast food! Enjoy!

Honey Oatmeal Sunflower Muffins
  • 1 cup rolled oats
  • 1 cup buttermilk
  • 1 cup whole wheat flour
  • 2 tsp baking powder
  • 1/2 tsp baking soda
  • 1/3 cup liquid honey
  • 5 tbsp butter, melted
  • 1/4 cup brown sugar
  • 1 egg
  • 1/4 cup plus 1 tbsp salted sunflower seeds
1. Preheat oven to 375 degrees. Lightly grease muffin tins and set aside.
2. In a large bowl, stir oats with buttermilk and let stand for 15 minutes. Meanwhile, in a separate large bowl, whisk together flower, baking powder and baking soda.
3. Whisk honey, melter butter, sugar and egg into buttermilk mixture. Pour over dry ingredients. Add 1/4 cup sunflower seeds on top, and stir everything together until dry ingredients are moistened.
4. Pour into muffin tins and sprinkle with remaining sunflower seeds. Bake in preheated oven for about 15 minutes.
5. Remove from oven and let cool (slightly) before serving. ENJOY!

Monday 16 May 2011

Mexican Inspired Baked Fish

I've mentioned before the benefits of eating fish, so I won't get into that tonight. I will just remind all of you to make sure you are eating it often :) We've been eating it on a weekly basis lately, so I am always looking for new ways to prepare/serve it. Here's a super simple recipe that tastes great. I am sure this recipe will convince even the pickiest of fish eaters to dive in! I hope you enjoy it as much as we did!


Mexican Baked Fish
  • 8 oz of fish filets (of choice)
  • 1/4 cup salsa
  • 1 tbsp grated asiago
  • 6 large corn chips, crushed
1. Preheat oven to 400 degrees.
2. Place fish filets in a lightly greased dish (if filets have skin, place skin side down).
3. Spoon salsa evenly over filets, then sprinkle with a layer of asiago, followed by a layer of corn chips.
4. Bake in preheated oven for 20 minutes, or until fish flakes easily with fork.
5. Remove from oven and serve immediately. ENJOY!

Sunday 15 May 2011

French Toast

Good Morning! Already made my recipe for the day - French Toast! We just enjoyed this for breakfast, served alongside some fruit. Yum! It's quick, it's easy, and it's homemade! Enjoy!


p.s. We had a few buns leftover from Friday, so I sliced these up and used them to make the French Toast. Great breakfast!

Jenno's French Toast
  • 4 farm fresh eggs
  • 2/3 cup milk
  • 1 tsp vanilla
  • 2 tbsp brown sugar
  • 24 small slices or 12 full slices of homemade bread
  • cinnamon for sprinkling
1. In a large bowl, whisk together eggs, milk, vanilla and sugar until well blended.
2. Heat fry pan to med-high heat and lightly grease.
3. Dip slices of bread in egg mixture and evenly (and lighlty) coat all sides of the bread. Place coated bread in hot fry pan and sprinkle with cinnamon (I find this works better than mixing the cinnamon in with the eggs, as it generally floats and then not all slices get some).
4. Cook bread on each side until golden brown.
5. Remove from heat, butter and serve immediately. ENJOY!

Saturday 14 May 2011

Creme Brulee

Mmmmmmmmmmmmmmmm.......Creme brulee has got to be one of my favourite desserts. I love to try it at different restaurants and have even been known to skip main course and go straight to the brulee! For my birthday last month, Mike gave me some creme brulee dishes and a torch so that I can make my own. Today I couldn't wait any longer and had to make some. Most recipes online are the same, involving 4 different ingredients. I only have 2 larger dishes and 2 smaller ones, so these are the measurements I used. The result was amazing and simply DELICIOUS!!!! I also noticed that some recipes call for white sugar for the topping (for torching) and some call for brown. I decided to try both to see what we prefer and the vote was unanimous - brown sugar worked and tasted best! I know that creme brulee is not "healthy", especially if you are dieting, but my love for it makes it mandatory to be on this blog. Enjoy!

Creme Brulee
  • 1 1/3 cups table cream
  • 1/4 cup white sugar
  • 1 1/2 tsp vanilla
  • 3 egg yolks
  • 2-4 tbsp brown sugar
1. Preheat oven to 325 degrees.
2. In a microwavable dish, warm cream, sugar and vanilla for 2 minutes in microwave, stirring every 40 seconds.
3. In a separate bowl, whisk egg yolks until creamy. Pour a little of the warm cream mixture into egg yolks and whisk for about 10 seconds. Add entire yolk mixture to cream mixture and whisk until smooth.
4. Pour mixture between 3-4 ramekins. Set ramekins in baking pan and pour enough hot water in pan to come up 1/2 way on side of ramekins.
5. Place pan with ramekins in oven and bake for about 30 minutes (or until set but slightly jiggly).
6. Remove from oven and place ramekins in a 2nd pan, filled with cold water. Leave in cold water bath for 15-30 minutes, then transfer to fridge for at least 2 hours before serving.
7. Right before serving, remove ramekins from fridge and top each evenly with 1/2-1 tbsp brown sugar. Using a torch, melt sugar until golden and crispy. Allow creme brulee to sit for a few minutes before serving. ENJOY!

**If you don't have a torch, you can broil these in your oven for a few minutes (watch closely), for a similar effect.**

Friday 13 May 2011

Watermelon and Feta Salad

**This was originally posted Wednesday, but due to some technical issues with blogger, it is showing up as today's post?!?**

In search of a recipe to use up some extra watermelon, I came across this one. It is very simple to make, and definitely worthy of my healthy rating ;) If you can, chill your watermelon first (before cutting), then mix this up right before serving. Enjoy!


Watermelon and Feta Salad
  • 1/2 small, seedless watermelon cut into bite-sized pcs
  • 1 cup crumbled feta cheese
  • 1/2 cup sunflower seeds
  • Pepper to taste (optional)
1. Toss all ingredients together in large bowl. Serve immediately. ENJOY!

Delicious Buns :)

I know you are all probably thinking - "ANOTHER bun/bread recipe!?!?"......well, you have to remember that I use this site as a personal reference library quite often. Today I baked up some very tasty buns and definitely want to keep this recipe. They aren't quite as basic as the other bun recipe I posted; And while that recipe is good, too, this recipe will now be my "go-to bun recipe". By recording it on here for myself, you benefit by getting to have it at your fingertips, too! We used these for hamburgers tonight, but these will definitely work for any type of sandwich. They truly were delicious! Enjoy! (*remember to look back to step-by-step recipe for more thorough instructions*)


Delicious Buns!
  • Preferment
    • 1 cup warm water
    • 1 cup AP flour
    • 1/2 tsp yeast
    • 1 tsp white sugar
  • 1 egg
  • 3 tbsp butter
  • 2/3 cup milk, slightly warmed
  • 2 tsp white sugar
  • 1/2 tsp salt
  • 3 1/2 - 4 cups AP flour
1. Make your preferment (by whisking all together) 1-16 hours before starting bread process (*keep covered).
2. When you are ready to begin bread process, melt butter in microwavable bowl. Add egg and beat well.
3. Remove cover from preferment and carefully add 3 cups flour and all other ingredients (inculding melted butter/egg mixture) to same bowl. Begin to knead with mixer or hands/wooden spoon. Add more flour if needed (dough should be slightly sticky. If you need more liquid, add a bit of milk).
4. After kneading for 5-7 minutes, form dough into ball, lightly oil and place back in bowl and then in microwave to proof (see tips/instructions on step-by-step recipe). Proof for 1 - 1 1/2 hours, until double in bulk.
5. Remove dough (in bowl) from microwave and carefully pour onto counter. Divide and lightly shape into 12 balls. Place dough balls on lightly greased cookie sheet.
6. Place cookie sheet back in microwave to proof, uncovered, for 30-60 minutes, or until doubled. After first 20 minutes, turn oven on to 400 degrees.
7. When dough has doubled, place directly in preheated oven and bake for 15-18 minutes, or until lightly browned.
8. Immediately after removing buns from oven, lightly brush with butter (this will soften them). Let cool (slightly or completely) and serve. ENJOY!

Tangy Deviled Eggs

**Blogger was in read-only mode for the last 24 + hours. That is why I didn't/couldn't post yesterday. Here is Thursdays recipe.**

Here is your fact for the day:

"An egg contains the highest quality of food protein known; each Grade A large egg contains 6 grams of protein. It is so nearly perfect that egg protein is the standard by which other protein is measured. The egg is second, only to mother’s milk, for human nutrition."

So next time you need to bring something to a potluck, or want an addition to your own meal, reach for the egg carton. These eggs are a nice alternative to traditional deviled eggs. Enjoy!


Tangy Deviled Eggs
  • 6 free range eggs, hardboiled
  • 1/3 cup mayo (ish - depending on how big your yolks are!)
  • 1 1/2 tsp dijon mustard
  • 1 tsp rice wine vinegar
  • 1/2 tsp dill weed
1. Slice eggs in half lengthwise. Scoop out yolks and place in bowl (set whites aside).
2. Mash yolks in bowl, with mayo, vinegar, mustard and dill weed.
3. Spoon yolk mixture back into eggs whites. Refrigerate until serving. For a nicer presentation, sprinkle with paprika or garnish with a dill sprig. ENJOY!

Tuesday 10 May 2011

Black Bean Hummus

Beans beans, the magical fruit.
The more you eat, the more you ...................... Benefit!


Most people know that beans are good for you. Not only are they high in fibre, which naturally helps to lower cholesterol, they are virtually fat free. Black beans, in particular, also come in first of all the beans in terms of antioxidant power. So grab yourself a can, whip up this QUICK dip, and eat away. You'll do your body good ;) Enjoy!

Jenno's Black Bean Hummus
  • 1 can (15 oz) black beans, drained and rinsed
  • 1/4 cup salsa (homemade or not)
  • 1 clove garlic, minced
  • 1/2 tsp cumin
  • 1 tbsp lemon juice
  • 1 tbsp EVOO (optional - omit for a fat free snack!)
1. In bowl of food processor, add beans, salsa, garlic and cumin, and blend until well combined.
2. While food processor is running, stream in lemon juice and EVOO. Mix until smooth (about 20-30 seconds).
3. Pour hummus into bowl and serve with chips or veggie sticks for dipping. ENJOY!

**If you omit the EVOO, you may want to add more salsa or lemon juice to make dip smoother**
**The kids and I just ate this for lunch. Their favourite was dipping carrot sticks in the hummus**

Monday 9 May 2011

Balsamic Dijon Dressing

Tonight's dinner was salad, topped with some leftovers (sausage, grilled peppers and onions, and hard boiled egg). This is the dressing I made to go on the salad. This dressing is quite tasty and would work on many different salads. I came up with the measurements in this recipe according to my/our tastes. Tweak as you see fit to your taste preferences. Enjoy!

Balsamic Dijon Dressing
  • 1/8 cup balsamic vinegar
  • 1/3 cup EVOO
  • 1/2 tbsp dijon mustard
  • 1/2 tbsp honey
  • 1 tsp lemon juice
  • s&p to taste
1. Pour all ingredients into mason jar and shake the heck out of it. Taste, season if necessary. Pour over salad immediately after shaking. ENJOY!

I realized I took the pic BEFORE adding the dressing - whoops :)

Sunday 8 May 2011

Grilled Peppers and Onions

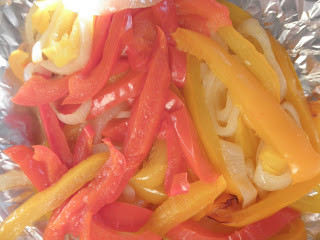
Tonight's recipe is so easy I'm not sure if it's even a recipe?! But nonetheless, I am posting it anyway. Perhaps it will inspire one of you readers to add this to your BBQ menu next time you grill. You can use these grilled peppers and onions as burger, sausage or steak toppings, or eat them on their own. They were delicious! And a great way to get some extra veggies! (you could also store these in the fridge and use as a sandwich/wrap/pita topping the next day). I hope you enjoy....(and I certainly hope you are enjoying this perfect BBQ weather we are finally getting!).

Grilled Peppers and Onions
  • 1 large red pepper
  • 1 large orange pepper
  • 1 large yellow pepper
  • 1 small onion
  • Drizzle of olive oil
1. Fire up your grill! Tear off a large piece of tin foil and set aside.
2. Cut peppers into julienne strips and place in centre off foil. Peel and slice onions into rings, then place on top of peppers. Lightly drizzle everything with olive oil.
3. Wrap peppers tightly in foil, forming a sealed pouch. Place pouch directly on grill and cook for 35 minutes over med heat.
4. Remove from grill, unwrap and serve. ENJOY!
Happy Mother's Day!

Strawberry Cake
(Recipe from yesterday)

Saturday 7 May 2011

Strawberry Cake

2 cake recipes in a row?!?! Must be a special week-end or something!  ;)  Today Darwin declared that he really wanted to bake Mommy a cake for Mother's Day. And not just any cake - a Strawberry Cake! So the 2 of us (with a little help from Big Little D) whipped this one up on a whim, and it worked. I'm a lucky Mommy for having such thoughtful boys.

This is today's posted recipe more by default; it has fruit and it's one of the few things I made or ate today (the recipes for the other meals/snacks we ate today have already been posted). It might not be the healthiest per se, but it sure is tasty! And beats a boxed mix any day! Enjoy!

Darwin's Strawberry Cake
  • 1 cup butter, softened
  • 1 3/4 cups white sugar
  • 3 eggs
  • 3 tsp vanilla
  • 3 cups flour
  • 4 tsp baking powder
  • 2 cups frozen strawberries, thawed (but not drained)
1. Preheat oven to 350 degrees. Lightly grease 2 8- or 9-inch round pans.
2. In large bowl, cream together butter and sugar until light and fluffy. Add eggs and vanilla and blend/stir for another 2 minutes.
3. In a separate bowl, whisk together flour and baking powder. Gradually add to creamed mixture and stir gently until thoroughly combined.
4. Lightly mash frozen strawberries. Pour strawberries and all juices into cake batter and stir until smooth (with strawberry lumps, of course).
5. Pour batter into greased pans and bake in preheated oven for 25-30 minutes, or until cake springs back to the touch.
6. Let cool then frost with your favourite buttercream or cream cheese icing. ENJOY!

Friday 6 May 2011

Sour Cream Coffee Cake

Looking for a good recipe to make for Mother's Day? Here is my favourite coffee cake recipe, often served at Mother's Day brunch (we'll be eating it a day early this week-end, as it's in the oven right now!). This recipe comes from a little cookbook entitled Bake Sale Bestsellers Cookbook. I've been making this recipe for years and never change a thing (with the exception of the middle layer - I add extra cinnamon and skip the nuts - toss in some pecans if you'd like!). It is best served warm, drizzled with a little caramel sauce. DELISH! Treat your mom, or yourself, and bake one this weke-end. I'm sure you'll love it, too! Enjoy!

Sour Cream Coffee Cake
  • 1 cup butter, softened
  • 1 1/4 cups sugar
  • 2 eggs
  • 1 cup sour cream
  • 1 tsp vanilla
  • 2 cups flour
  • 1/2 tsp baking soda
  • 1 1/2 tsp baking powder
Middle/topping:
  • 2 tbsp brown sugar
  • 1/2 tbsp cinnamon
1. DO NOT PREHEAT OVEN.
2. Cream butter, sugar and eggs until fluffy. Blend in sour cream and vanilla.
3. In separate bowl, whisk together flour, baking soda and baking powder. Add to creamed mixture and stir a few times to combine.
4. Place half of batter in greased bundt pan.
5. Combine sugar and cinnamon for middle layer. Sprinkle 3/4 on top of batter in pan.
6. Add remaning batter and sprinkle with remaning cinn/sugar mix.
7. Place pan in COLD oven and turn to 350 degrees. Bake approx. 55 minutes, or until toothpick inserted in centre comes out clean.
8. Serve warm, drizzled with caramel. ENJOY!

Thursday 5 May 2011

Brown Butter Rainbow Trout

Another fish recipe. It's real simple to make, and really enjoyable to eat! Give 'er a try and I'm sure you'll love it, too! This works well over rice, or even paired with a salad. (I paired it with my Easter recipe "cheater" post - Balsamic Butter Asparagus.....it was a buttery dinner ;) .


*This recipe is for 1 8-ounce filet. Obviously you can easily double/triple qty if making more servings!*

Brown Butter Rainbow Trout
  • 1 8-oz Rainbow Trout Filet, cut in half
  • 2 tbsp butter
  • 1/2 lemon, juiced
  • s&p
1. Warm cast iron skillet on med-high heat. Add butter and allow to melt and brown a few minutes.
2. Squeeze lemon juice into melted butter and whisk to combine. Add s&p at this step as well.
3. Let butter and lemon juice cook about 2 minutes before adding fish (or until butter is bubbly and visibly brown). Add fish to pan, skin side up. Cook for 2 minutes then flip. Cook for another 2 minutes, or until fish is cooked all the way through (/ flakes apart easily).
4. Spoon butter sauce over fish and rice before serving. Enjoy!

Wednesday 4 May 2011

Black Bean Quesadilla

Olé! Mexican night at our house. Here's a recipe for some tasty quesadillas. These were gobbled up and thoroughly enjoyed. I hope you enjoy them, too!


Black Bean Quesadillas
  • 4 homemade tortilla shells (see recipe from March 21)
  • 1 can black beans, drained and rinsed
  • 1/2 cup homemade fresh salsa (see recipe from May 3)
  • 1 cup shredded marble cheese (or any cheese you'd like!)
  • sour cream and extra salsa for dippin'
1. Preheat oven to 350 degrees.
2. Lay 2 tortilla shells on cookie sheet. Top each evenly with 1/2 can black beans, 1/4 cup salsa, 1/2 cup shredded cheese (put 1/4 cup on bottom, 1/4 cup on top). Cover each with a second tortilla shell.
3. Bake in preheated oven for 8-10 minutes, or until cheese is completely melted.
4. Serve immediately with some salsa and sour cream. ENJOY!

Tuesday 3 May 2011

Fresh Salsa

Tonight's recipe was whipped up using some fresh veggies I just purchased. It took a bit of time to get everything chopped up, but it was worth the effort. The taste was wonderful. No jar of mass-produced salsa can beat it. I hope to make other salsas this summer with veggies from our own garden. For now, this one will definitely do! This recipe would also double as a wonderful bruschetta topping (perhaps with some feta cheese! hmmmmmm....note to self - future recipe potential!). Watch for this recipe in tomorrow night's dinner recipe, too! As always - Enjoy!

Jenno's Fresh (Mild) Salsa
  • 4 roma tomoatoes, cored and diced
  • 1/3 onion, finely chopped
  • 1 garlic clove, very finely chopped
  • 1/4 each red, yellow and orange peppers, diced
  • 1 tbsp lemon juice
  • fresh cracked s&p
  • 1/2 tsp crushed red pepper flakes (more if you want a little more heat)
  • small spinkle white sugar
  • 3 fresh (big) basil leaves, finely chopped
1. Placed chopped tomatoes, onion and garlic in bowl. Set aside for a few minutes, while dicing peppers.
2. Before adding peppers to tomato mixture, give mixture a stir, then drain any excess liquid. After liquid is drained, add peppers and stir.
3. Add remaining ingredients to bowl and combine well. Be sure to sample, and add more s&p or whatever you'd like.
4. Serve immediately or store in fridge for a few days (if it lasts that long!). ENJOY!

Monday 2 May 2011

Oven Roasted Cauliflower

A favourite vegetable in this house is cauliflower. My boys eat it up everytime. I like to try new recipes and/or methods of preparing it, just to mix things up a little. This recipe is a keeper. Give it a try and let me know what you think. I found the inspiration for it while scanning a recipe website (surprise - NOT allrecipes!). Enjoy!

Oven Roasted Cauliflower
  • 1 head cauliflower, cut into florets
  • 2 cloves garlic, finely chopped
  • 2 tbsp lemon juice (or juice from half a lemon)
  • 1 tsp lemon zest
  • fresh cracked s&p
  • drizzle olive oil
  • 1/4 cup asiago cheese
1. Preheat oven to 400 degrees. In a shallow baking dish, or on a cookie sheet, arrange cauliflower florets in a single layer. Sprinkle on minced garlic, lemon juice, lemon zest, s&p and a drizzle of EVOO. Lightly toss to combine and evenly coat.
2. Bake in preheated oven, uncovered, for 25-30 minutes or until tops of cauliflower is lightly browned.
3. Remove from oven and immediately sprinkle with asiago cheese. Serve and enjoy.

*You may notice that my recipes call for fresh cracked pepper AND salt. If you can, invest in a salt grinder in addition to your pepper mill. Fresh cracked sea salt is much tastier than regular table salt!*

Sunday 1 May 2011

Sweet (Amish) White Bread

This recipe (slightly modified) comes from allrecipes.com (yah, my favourite site!). The bread is wonderful to eat alone. And the dough even doubles as a great one for making cinnamon buns (I'll have to post that recipe another time!). Enjoy!


Sweet (Amish) White Bread
  • Preferment (mix together and set on counter covered, 2-16 hours ahead of time):
    • 1 cup warm water
    • 1/2 tsp active dry yeast yeast
    • 1 tbsp white sugar
    • 1 cup white flour
  • 1 cup warm water
  • 1/2 cup white sugar
  • 2 tsp active dry yeast
  • 1/4 cup canola oil
  • 4-5 cups AP flour
1. In a large bowl, combine preferment and all other ingredients, except ONLY 3 1/2 cups of the flour, adding the flour 1 cup at a time. (Have the remaining flour ready to add if/when needed).
2. Mix together with wooden spoon or dough hook on KA mixer. Once combined, add enough extra flour to create a slightly tacky dough. Knead with hand or hook for 5 minutes.
3. Place dough in well oiled bowl and proof in microwave (see notes on this from step-by-step bread recipe).
4. After about an hour, dough will have doubled in size. Gently dump dough onto counter and divide into 2 equal portions. Lightly pat/stretch each portion to create a rectangle. Fold rectangle into thirds, as you would a letter.
5. Place folded dough into bread pans. Place back in microwave to proof, uncovered.
6. The second rise will take about 60-90 minutes for dough to rise above sides of pan. 30 minutes into 2nd proof, pre-heat oven to 350 degrees.
7. Once dough is ready for the oven, bake in preheated oven for 25-30 minutes (or until golden brown and hollow sounding when tapped). If you'd like a softer crust, immediately brush bread with butter.
8. Allow bread to cool (even just slightly) on wire rack before slicing. ENJOY!